Carry optics, also known as pistol-mounted optics or red-dot sights, are becoming increasingly popular because they make accurate shooting easier. However, moving from iron sights to a carry optic doesn’t require less training. A well-trained shooter may become proficient after about 500 rounds of live fire, but 1,000 rounds and many hours of dry-fire practice are even better.
I was not one of those shooters who adapted quickly. It took considerable thought and practice before I was willing to leave my trusted, rust-speckled 1911 behind and move to a 9mm with a carry optic. The decision wasn’t about romance but reality. Once I practiced, shooting with the red dot was like having an epiphany. Shooters who train properly are faster and more accurate with a red-dot sight.
In defensive shooting, the same principles used in competition still apply. Rather than focusing on the front sight, keep both eyes on the threat and superimpose the dot on the target. As the pistol recoils, don’t chase the dot. Maintain your focus on the target and drive the dot back onto it. The result is greater speed and accuracy.
None of that matters, however, if the optic isn’t mounted correctly.
Why Proper Red Dot Installation Matters
A poorly mounted optic can quickly become a liability. I’ve seen a Holosun 407 fly completely off a handgun and land downrange. Despite the dent and scratches, the sight still worked after it was reinstalled. The difference was proper installation. The shooter applied Loctite to the screws and now checks them every 1,000 rounds or so.
Whether your defensive handgun has a direct-mount system or an optics plate, proper installation is essential. A securely mounted optic means you can trust your sight to stay in place when you need it most.
What Does ‘Optics Ready’ Mean?
An optics-ready handgun simply means the slide is milled to accept a red-dot sight. Depending on the handgun, the optic may attach directly to the slide or it will require a mounting plate system.
Older handguns are less likely to be milled for an optic. In my opinion, purchasing a new optics-ready handgun makes more sense because you will also benefit from other upgrades.
But if you’re attached to your Glock Gen 3, for example, you can have it cut for a direct-mount RMR or RMSc footprint. Having a slide milled may cost around $125, depending on your location and the gun being modified.
Before buying your concealed carry gun or an optic for it, determine which mounting system the handgun utilizes and whether the optic you want is compatible. Aftermarket plates can provide additional options but will add cost and may need to be ordered separately.
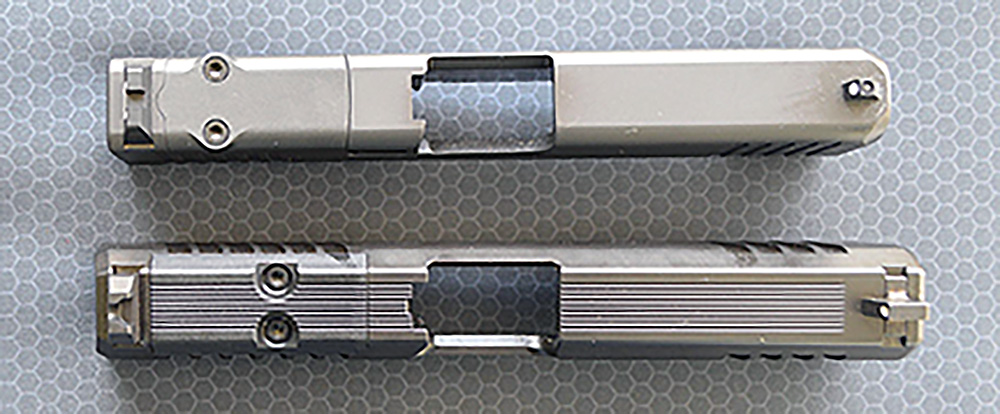
Direct-mount slide (top) vs. a slide that requires a mounting plate (bottom).
Direct-Mount Optics
With a direct-mount system, the red-dot sight attaches directly to the slide. The Trijicon RMR is one of the most popular direct-mount options for larger sights, while the Shield RMSc footprint is common on smaller slides.
Direct mounting is generally the sturdier system because it uses fewer parts and fewer screws. The Glock Gen 6, for example, uses a direct-mount system with a compression washer.
Optics Plate Systems
A plate system uses two connections: The plate screws to the slide, then the optic screws to the plate. Glock Gen 5 and the Smith & Wesson M&P 2.0 as well as some Canik pistols are supplied with several plates to accommodate popular red-dot sights.
Other pistols may include only one plate or require the owner to order the correct plate. The Rost Martin RM1F comes with a single RMR plate, while plates for some pistols, like the CZ P-10 and Walther PDP, must be ordered from the manufacturer. Plates for 1911 and 2011 pistols may be among the most expensive.
A properly installed plate system can work very well. I own several Glock 9mm pistols, along with CZ and Dan Wesson handguns, with plate-mounted optics have remained secure through thousands of rounds. Proper installation is necessary.
Other Mounting Systems
Some manufacturers use mounting systems designed to accommodate several optics. The Springfield Echelon’s variable interface system, for example, uses a pin system that accepts a range of red-dot sights.
Whatever system you choose, consider the complete cost before purchasing. An affordable handgun may become less economical once additional magazines and mounting plates are included.
Understanding Red-Dot Footprints
A red-dot footprint is simply the pattern on the base of the sight that determines how it attaches to the slide or mounting plate. These patterns are not universally interchangeable.
The RMR and RMSc are among the most common footprints. Other designs include the Leupold DeltaPoint and Docter patterns.
The RMR footprint is used by sights from Trijicon, Holosun and TruGlo. The original Shield sight and Burris FastFire are available in the RMSc pattern. Compact pistols may be better suited to the smaller RMSc footprint, while larger pistols commonly accommodate the RMR.
The Aimpoint ACRO is a superbly sturdy mounting design. It is available on pistols including the Glock COA, Springfield Echelon and Smith & Wesson Spec Series models.
Footprint compatibility cannot be stressed enough. Before purchasing a handgun or optic, verify that the sight will fit the slide or that the correct mounting plate is available. Chances are an aftermarket plate exists for many combinations, but it is better to confirm that before buying.
Tools You’ll Need
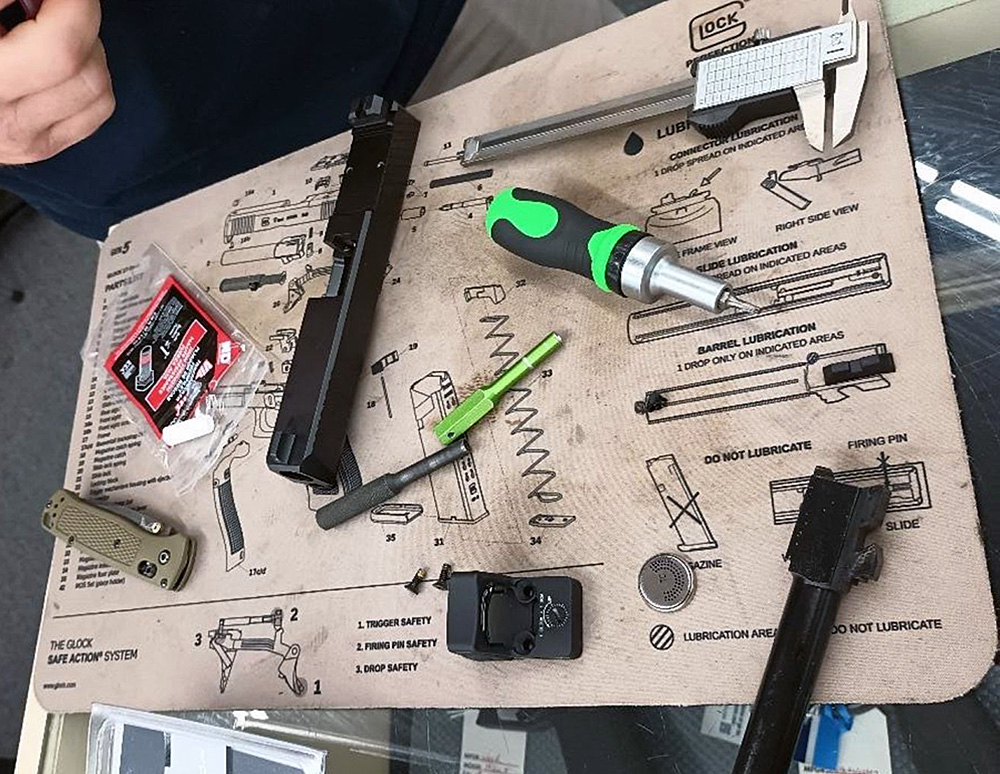
To avoid aggravation and perform the simple operation of adding a red dot efficiently, be certain you have all of the tools needed before you begin.
You will need:
- the optic
- the correct mounting plate, if required
- mounting screws
- a driver with the proper fitting for the screws
- a torque wrench
- Loctite
- de-greaser
- white poster board or a gunsmith’s mat if you’re working at a kitchen table or desk
Some sights supply several sets of screws. Vortex, for example, supplies multiple small screw packs with its sights. This is useful because screws that are too long may prevent the plate or optic from tightening properly.
How to Mount a Red-Dot Sight
Once you have confirmed that the optic, footprint, plate and screws are compatible, the installation itself is straightforward. Always consult the handgun owner’s manual.
Prepare the Slide
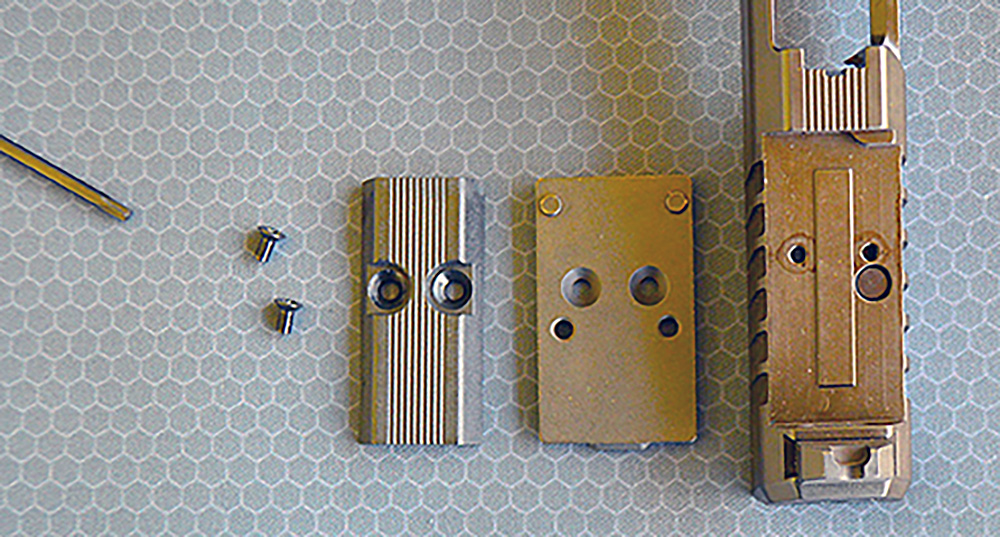
The slide (right), RMR plate (center), and slide cover (left) of the Rost Martin RM1F.
Make certain the handgun is unloaded. Disassemble it, then place the slide on a stable work surface with the sight surface area facing upward.
Carefully clean and degrease the slide, mounting plate and screws. The mounting surface is often greased at the factory
Test-Fit the Components
Before applying threadlocker or the final torque, I like to perform a dry run.
Place the mounting plate on the slide, if one is required, and make certain it is properly aligned. Some plates may need a slight nudge before they seat correctly. Do not tighten the screws until the plate is fully in place.
Next, position the optic on the plate or directly on the slide. Confirm that the sight sits flat and that the screws fit correctly.
If the screws tighten but the plate remains loose, the screws may be too long. The correct screws should secure the plate or optic without affecting operation. Sometimes, the screws that originally held the cover may also work for the mounting plate.
Install the Mounting Plate
If your handgun requires a mounting plate, that should be installed before the optic.
Be certain the plate is properly aligned before tightening. Some designs may require a little nudge to fit properly.
Apply a drop of blue Loctite to each screw. Too much may spread beneath the plate, making removal difficult later. In some cases, it may spread into the extractor tunnel. A little threadlocker goes a long way!
Pay close attention to the screws holding the plate to the pistol. In my experience, these seem to work loose more often than the screws holding the sight in place.
Tighten gradually, making sure the plate stays properly aligned.
Install the Optic
Next, we mount the optic. Place the optic on the slide if direct mount or on the mounting plate. Carefully line up the screws and apply a drop of Loctite. Some screws may arrive with Loctite in the threads, but I still prefer to install them with fresh, wet Loctite.
Partially tighten one screw, then the other, alternating sides until both are snug. This helps keep the optic seated evenly.
 Torque the Screws
Once the plate and optic are properly aligned, apply the manufacturer’s specified torque with a torque wrench. Feel alone is not enough.
Most applications call for 15 pounds but consult your owner’s manual. Overtightening may damage the screws, while insufficient torque could allow screws to work loose.
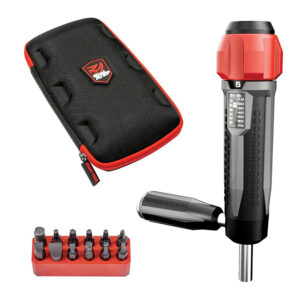
A proper torque wrench is important. The Real Avid is an affordable option with many uses.
Allow the Threadlocker to Cure
Do not immediately run to the range after installing your optic.
Allow the Loctite to cure before firing. Twelve hours is often recommended, but I prefer to wait 24 hours. Patience is a necessary virtue in this study.
Common Red-Dot Installation Mistakes
Most optic-mounting errors come from a few avoidable errors.
Using the Wrong Screws
You must use the correct screws when mounting a red dot sight. The wrong screws could leave the plate or optic loose or lopsided.
A screw that is too long will interfere with the extractor and prevent reliable extraction. This is one reason Glock updated its Gen 6 to direct mount.
Many major brands will provide screws if your optic is not supplied with the correct size. Try contacting customer service first.
Skipping the Threadlocker
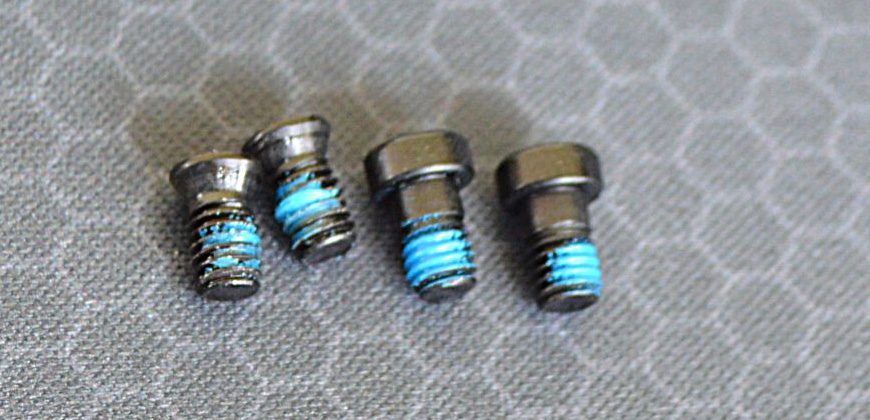
Failing to use blue Loctite is another common mistake. Recoil may gradually loosen screws that were installed dry.
Failing to Use a Torque Wrench
Tightening the screws by feel is not enough. Screws that are too loose may shift under recoil, while overtightened screws may snap and require a gunsmith to drill and tap the damaged mounting point.
Use the proper torque specification and a torque wrench.
Ordering the Wrong Footprint or Plate
Confirm compatibility before purchasing the optic or beginning the installation.
Skipping the Dry Run
A dry fit can reveal an incorrect screw length, poor plate alignment or wrong parts before threadlocker is applied.
How to Zero an Optic
Mounting the optic is only the first step. Your optic must be sighted in.
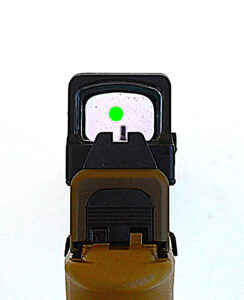
Before firing, use a screwdriver or the optic’s adjustment tool to adjust the dot to just over the front sight. This should get pretty close to the intended point of impact.
If brightness is adjustable, set it at a moderate level.
Establish a 25-Yard Zero
While most defensive encounters happen at close range, I sight my pistols for 25 yards.
A pistol zeroed at 7 yards may strike as much as 6 inches high at 25 yards. With a 25-yard zero, the shot may fall about 2.5 inches low at 7 yards. This is a more versatile and effective all-around zero.
Only live-fire can confirm zero. Sighting in the pistol will also assure the red dot is properly mounted and won’t shift. Firing about 50 rounds should suffice.
In my experience, a factory defect, which is rare, will turn up during the first box of ammunition.
Maintaining a Mounted Optic
A properly mounted optic should still be checked regularly. A small mark across the mounting surface will allow you to check visually once a month whether the screws have moved.
Final Thoughts
Mounting a carry optic requires only a few tools, but it demands attention to detail. Confirm the footprint, use the correct screws, clean the mounting surfaces, apply a small amount of blue Loctite and torque the screws properly.
Do not rush the process. Perform a dry run, allow the threadlocker to cure and confirm the installation with live fire. Patience, knowledge and a clear understanding of the goal make the difference between an optic that stays secure and one that works loose when it matters most.
FAQs
Can I mount a red dot on any pistol?
There are few handguns on which you cannot mount a red dot. Revolvers may be modified to a red-dot sight, Taurus offers the TORO set up, and even older 1911 pistols may be milled for a direct-mount optic.
Do I need a mounting plate?
It depends on the handgun and optic. Some pistols use direct mounting, while others require a plate. The current market is split 50/50.
What is the best red-dot footprint for concealed carry?
The RMR is a great set up for larger pistols, while compact pistols, like the SIG P365 and Glock 48, work best with the RMSc.
How tight should optic screws be?
The majority are torqued at 15 pounds.
Should I use threadlocker for optic screws?
Yes, but only blue Loctite.
How often should I check my mounting screws?
Once a month whether or not the gun is fired.
How do I know if my red dot is properly zeroed?
The sight must be confirmed through live fire at different distances. Aligning the dot with the front sight provides a starting point, but it does not replace range testing.